
DIY Raised Stenciling: Transform Your Walls, Furniture, and Crafts
My Journey into DIY Raised Stenciling
As I stood in my living room, a vision of transformation danced in my mind. The walls, though adorned with paint, felt bare. The furniture, practical yet ordinary, yearned for character. I had heard whispers of a magical technique—raised stenciling—promising the ability to breathe life into every surface it touched. With a mix of excitement and trepidation, I dove into the world of DIY raised stenciling, ready to create something unique.Gathering Materials and Tools
Before I could embark on my transformative journey, I needed the right tools and materials. Here’s what I gathered:- Stencils: I chose designs that spoke to me, ensuring they were not too intricate for my novice hands. Thick edges would make my task easier, so I avoided stencils with thin openings.
- Adhesive: A trusty spray adhesive was my companion, paired with painter’s tape for extra security.
- Filling Material: I opted for spackling compound, finding it easy to work with.
- Putty Knife: This became my trusty tool for applying the filling material.
- Paint and Finishing Products: A selection of paints and waxes awaited to bring my designs to life.
- Sanding Tools: I collected sandpaper to ensure a flawless finish.
Step-by-Step Process
Preparation
The first step was crucial—preparing the surface. I scrubbed it clean, ensuring it was smooth and ready for the artsy adventure ahead.Applying the Stencil
With my stencil in hand, I used the spray adhesive to secure it in place. Patience was key here; I took my time to position it just right.Adding the Raised Effect
With my putty knife, I spread the spackling compound over the stencil, ensuring an even coating without pushing it underneath. This was my moment—seeing the first hints of my design emerge was exhilarating.Drying and Removing the Stencil
As I waited for the filling to dry, I felt a blend of anticipation and anxiety. Once it was ready, I gently lifted the stencil, revealing the beautiful raised pattern.Finishing Touches
Sanding smoothed any rough edges. With a paintbrush in hand, I painted my design, using darker and lighter hues to add depth. A coat of wax sealed the deal, enhancing the durability and richness of the finish.Creative Applications
The transformation extended far beyond walls and furniture. I found endless opportunities for creativity:Furniture
An old dresser became a piece of art with raised stenciling. The technique worked wonders on nightstands and tables, turning them into conversation starters.Walls
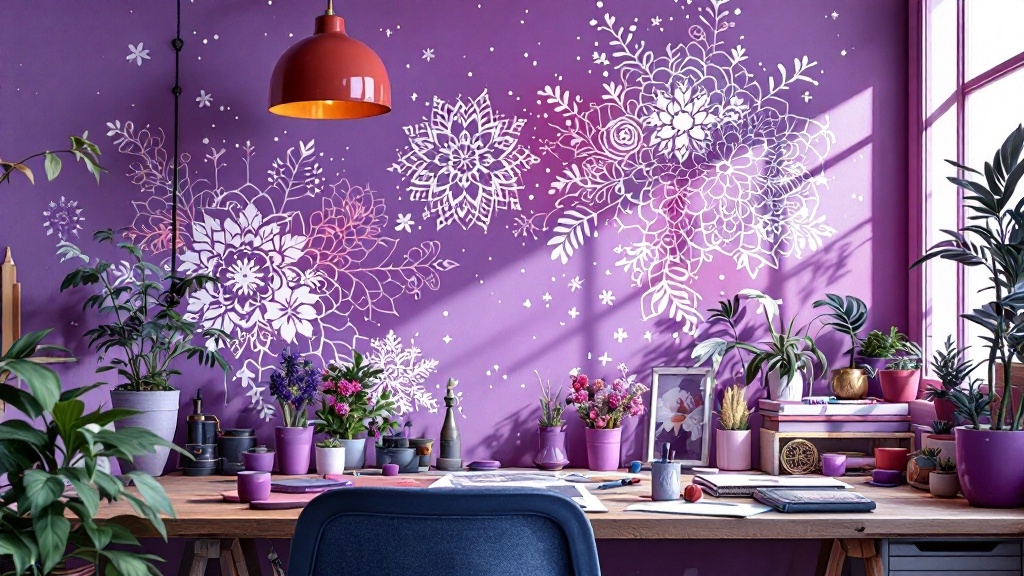
Imagine textured designs on your walls, each telling a story. The same raised stenciling technique applied here brings a cozy, intricate feel to any room.Crafts
I explored stenciling on planters and decorative boxes. Each project added a touch of character, showcasing my unique style to friends and family.Tips and Variations
As I continued my journey, I learned a few tricks to enhance my work:- Choose the right stencil size to simplify the process.
- Experiment with layering effects for a rich texture.
- Enjoy the flexibility—raised stencils hold their shape, even under multiple layers of paint!
Final Thoughts
My exploration of DIY raised stenciling turned into a rewarding adventure, transforming my spaces into reflections of my personality. Each stroke and every layer resonated with my journey, capturing a piece of my artistic spirit. As you consider this journey, remember that the possibilities are endless—allow your creativity to flourish. Don’t be afraid to experiment and embrace the imperfections; they tell a story of their own.Ready to start your own adventure? Explore a variety of beautiful stencils that can help you create stunning designs for your walls, furniture, and crafts. Happy stenciling!