
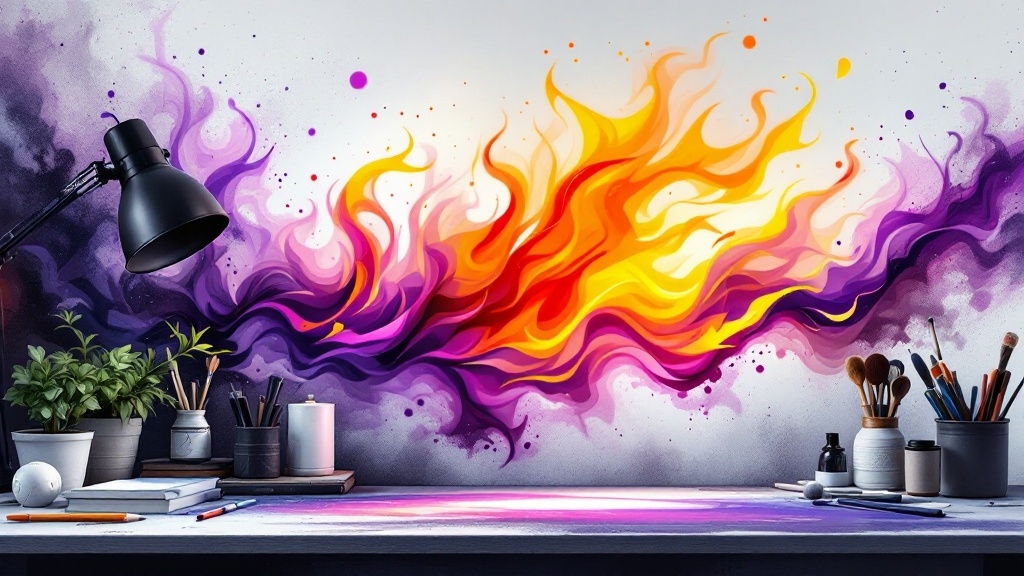
How to layer colors for a professional airbrushed flame design
As an artist, there's a special thrill that comes from creating something that resembles the raw power and beauty of fire. The swirling, dancing flames – they beckon with their vibrant hues. Today, let me guide you through my journey of perfecting airbrushed flame design using an effective layering technique. With a simple understanding of color mixing and artistic finesse, you'll find yourself on the path to mastery.
Choosing the right colors
Creating realistic flames begins with the right color palette. Picture the deep glow of fire, and you’ll realize its complexity. Here are the fundamental colors to explore:
- Reds and oranges: The heart of your flame. Start with deep reds to reflect the fiery core, then use bright oranges to build the outer layers.
- Yellows and whites: Those rays of light dancing around the flame. A mix of yellow with white adds that bright, glowing effect that brings your design to life.
- Browns and blacks: Not words you'd typically associate with fire, but they add much-needed depth and dimension to your design.
Layering technique
Base layer
Begin with a deep red base. As the core color of the flame, it sets the stage for everything to come. Use your airbrush with a light touch, allowing some areas to remain untouched. This creates space for your layers to breathe.
Adding orange and yellow layers
Next, gently move onto the oranges and yellows. Apply these colors in flame-like patterns, applying them lightly to keep transparency. Remember, a flame isn’t solid; it is alive, and so should your design be.
Highlighting
For the highlights, mix white with yellow. Stroke upwards with your airbrush as if the fire itself is reaching for the sky. This is where the flame starts to shimmer and dance. Freehand strokes create a flow that emulates nature’s erratic beauty.
Shading and depth
Have browns and blacks at hand for shading. Use them sparingly. Our aim is to enhance, not overshadow. These deeper colors will add dimension, allowing your flames to appear as though they’re swirling in the air.
Tools and techniques
Airbrush
Your airbrush will be your greatest ally. It allows you to layer colors seamlessly. Keep each layer thin and transparent to enhance that realistic effect.
Liquify tool (digital art)
If you’re exploring digital methods, consider using the liquify tool to manipulate and distort your flame patterns. This adds a unique dynamism that can elevate your design.
Blending modes
In a digital environment, play with blending modes like add glow or glow dodge. These functions help integrate your colors fluidly, creating that lively glow typical of flames.
Radial blur (digital art)
Try applying a radial blur effect to evoke motion. It adds fluidity, capturing the ethereal quality of fire, especially useful for creating a magical ambiance.
Tips for realism
- Translucency: Ensure to let the underlying colors peek through each layer. A truly realistic flame isn’t uniform; it radiates colors in rich textures.
- Voids and gaps: Incorporate pauses in your flame design. These gaps allow for movement, making the flames appear alive.
- Flow and direction: Always direct your flames upwards. Flames are naturally buoyant, so let that instinct guide your brush strokes.
- Reference: Keep a collection of real flame images handy. They serve as vital guides, helping to refine your sense of color and movement.
By embracing these layering techniques, your journey to create a stunning airbrushed flame design begins. Leverage the power of color and your personalized touch to set your creativity ablaze. The next time your brush touches the canvas, channel that elemental force – feel the fire.
If you're ready to explore various designs and stencils to complement your airbrush techniques, check out the wide array of choices available at Stencilair Abstract Designs.