Creating Mandala Art Using Stencils: A Personal Journey
When I first stumbled upon the world of mandala art, I was captivated by the intricate patterns and meditative process involved in its creation. It felt like a secret language of creativity waiting to be understood. Today, I want to take you on a journey through the steps I've learned while creating stunning mandala art using stencils.
Preparing Your Workspace
Before diving in, I found it essential to create a space that felt inviting yet protected. I spread a drop cloth over my table, shielding it from the inevitable spills and splatters of paint. This small act gave me peace of mind, allowing my creativity to flow freely without the fear of damaging my workspace.
Choosing and Preparing Your Materials
- Canvas or Surface: I've experimented with various surfaces, from canvas to wood pallets. Each brings a different vibe, but remember to choose a surface that’s suitable for your medium of choice.
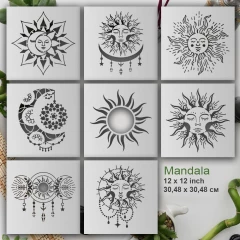
- Stencils: High-quality, reusable mandala stencils became my best friends. They often come with registration marks, guiding me in the alignment of my designs.
- Paints and Tools: I gathered an assortment of paints, a paint tray, and rollers or sponges. Fine liner pens became invaluable for those intricate details.
- Additional Tools: Having a compass for perfect circles and a Lazy Susan to rotate my artwork easily made my creative process smoother.
Positioning and Securing the Stencil
With everything in place, I carefully positioned my stencil. Centering it felt like placing the final piece of a puzzle. To keep it secure while painting, I used painters tape. This allowed me to focus completely on my art, knowing the stencil wouldn’t budge.
Painting Techniques
Painting with stencils became a dance of discovery. Here are some techniques I embraced:
- Loading and Offloading Paint: Before applying paint, I’d load my sponge or roller and then offload the excess onto a paper towel. This prevented the paint from bleeding.
- Painting: I found that a dabbing motion worked best. Starting from the center, I painted outwards in gentle strokes, watching the design come alive.
- Color Gradation: Mixing shades on my sponge while transitioning from center to edges created a beautiful depth in my mandala.
Masking and Customizing
By masking sections of my stencil with painters tape, I found ways to craft unique variations of a single design. Each piece transformed before my eyes, reflecting my personal style.
Drying and Reusing the Stencil
Patience became my companion. I learned to let the paint dry completely before removing the stencil. Allowing it to dry overnight made re-positioning effortless for adding new sections. The joy of cleaning and reusing stencils feels like a gift; they maintain their effectiveness, allowing several creations from one design.
Additional Tips for Precision
To enhance my designs:
- Registration Marks: Using these made aligning sections a breeze, especially with rotating stencils.
- Symmetry: The compass proved helpful for drawing perfect circles, ensuring my design remained balanced and beautiful.
Final Touches
As I completed my piece, I made sure to allow everything to dry completely. For that extra shine, I would apply a semi-gloss top coat, giving my mandala a professional finish.
Creative Freedom
The most liberating aspect of creating mandalas is the freedom to explore. I’ve learned to experiment with colors, patterns, and designs, intertwining my thoughts and emotions through each brushstroke. It became a journey of self-discovery.
So, whether you're just starting or looking to refine your skills, remember that creating mandala art is about the journey, not just the destination. Dive into this world with an open heart and let your creativity speak.
For more resources, check out these mandala stencils that can guide you along your artistic path.